Minimal Pin Kit: What Every Boater Should Carry
A pin kit doesn’t need to be complicated to be useful. If you’re running Class III or stepping into Class IV you can solve most real-world problems with a compact, thoughtful, minimal kit that fits into a small dry bag.
Why Start with a Minimal Kit?
Two reasons:
- Simplicity saves time. When a raft gets pinned, simple setups get built faster and with fewer errors.
- A light kit gets carried. Heavy, overbuilt pin kits often end up buried in a dry bag or left in the truck.
A minimal pin kit gives you enough capability to do a light mechanical-advantage pull for a pinned kayak, light raft, or a cataraft.
Contents a Minimal Pin Kit
The following list keeps weight low and utility high. These are foundational items for river runners who want a minimal and capable pin kit.
- Two 20-30’ sections of 1" tubular webbing
- 150’ static line or heavy duty throw bag
- 3–4 locking carabiners
- 1-2 compact prusik-minding pulleys
- 1-2 prusiks

Key Components of a Minimal Rafting Pin Kit
This kit gives you the core elements to build:
- Vector pull
- Basic 2:1
- Simple 3:1 (if you add a second pulley and prusik)
- Land anchor around a rock or tree
- Three point anchor on a raft
How to Pack It
Here are some tips to help organize your pin kits for ease of use:
- Tie webbing into “daisy chains”
- Combine each pulley, prusik, and carabiner together as they are generally used together
- Put all your gear into a dry bag (ideally Watershed Bag) with a padded liner
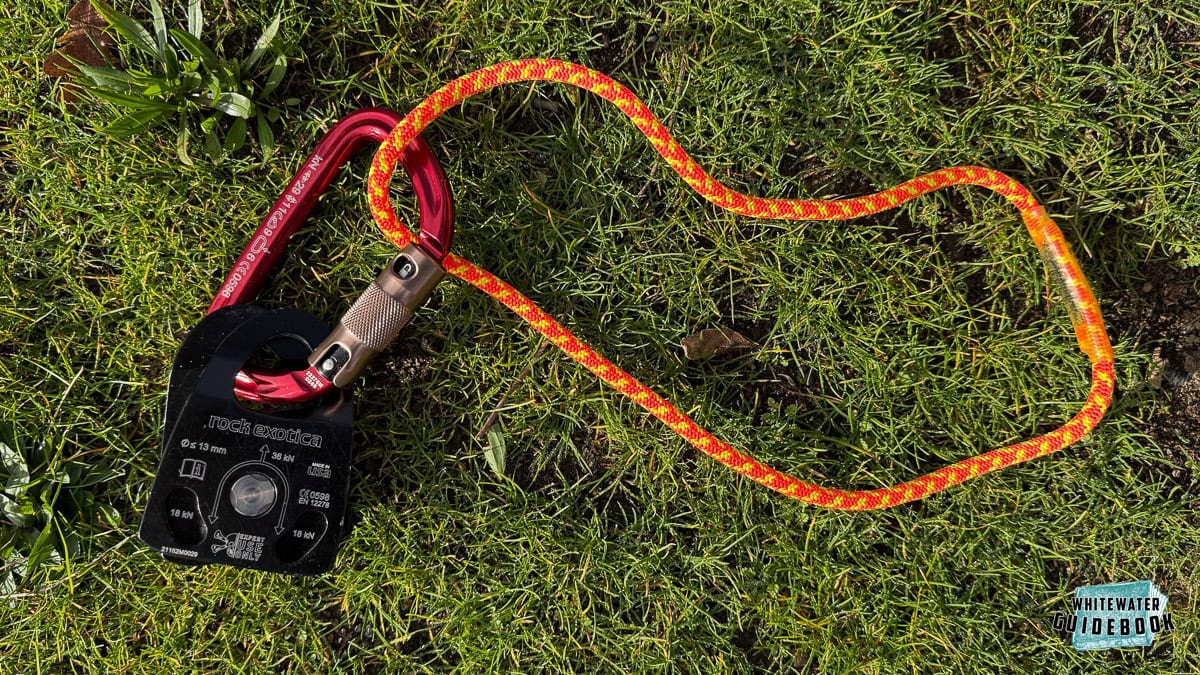
Combining a Carabiner, Pulley, and Prusik
Who is this for?
A minimal kit as described above is generally adequate for:
- Newer boaters
- Rental gear setups
- Class II–III trips
- Anyone who wants the basics without carrying a ton of equipment
When to Upgrade
You you may want to bring more hardware and include a heavier duty rope when:
- You’re regularly in Class IV+
- You guide commercially
- You want reliable progress capture and more mechanical advantage
- You're rowing heavier gear rafts
When you’re ready for a serious jump in capability, move to an Outfitter Pin Kit.