Pro Tip: Wooden Oar Maintenance pt. 2
This is the second part of my adventure into refinishing a couple of oars. If you didn't see the first part, check it out here. These oars have a fiberglass finish on the blades but they were showing. Some of the fiberglass had cracked causing the wood underneath to deteriorate. So I decided to patch the holes and add an additional fiberglass layer.
Please keep in mind I am not a professional wood worker or fiberglass person. I did a little research and followed some instructions. Keep reading for tips and things I learned along the way.
Tools
- Fiberglass kit
- Brush
- Respirator / mask
- Eye protection
- Gloves
- Knife or Boxcutter
- Sander and sandpaper
The hardware store sells a fiberglass repair kit that comes with almost everything you need. I had to buy two sheets of extra cloth because what came with the kit wasn't enough to cover the entire blade.
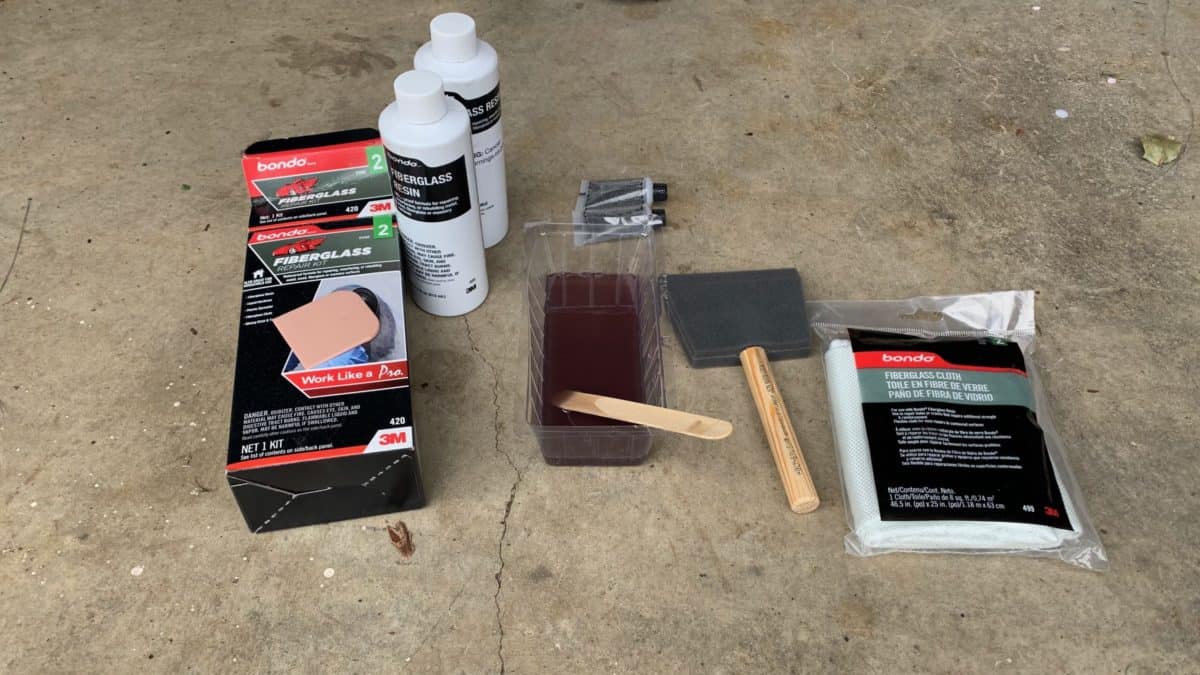
Fiberglass Repair Kit
Prep
Scrap any chipped or cracked areas of old fiberglass away. A small hole / crack may turn into something larger, so be prepared for small areas to turn into big ones. The wood underneath these cracks and holes will likely have some signs of water damage. Sand those areas down, while smoothing the edges of the fiberglass. The blades I was working with had some a few areas that had been chipped so I decided to patch them before covering the entire blade.
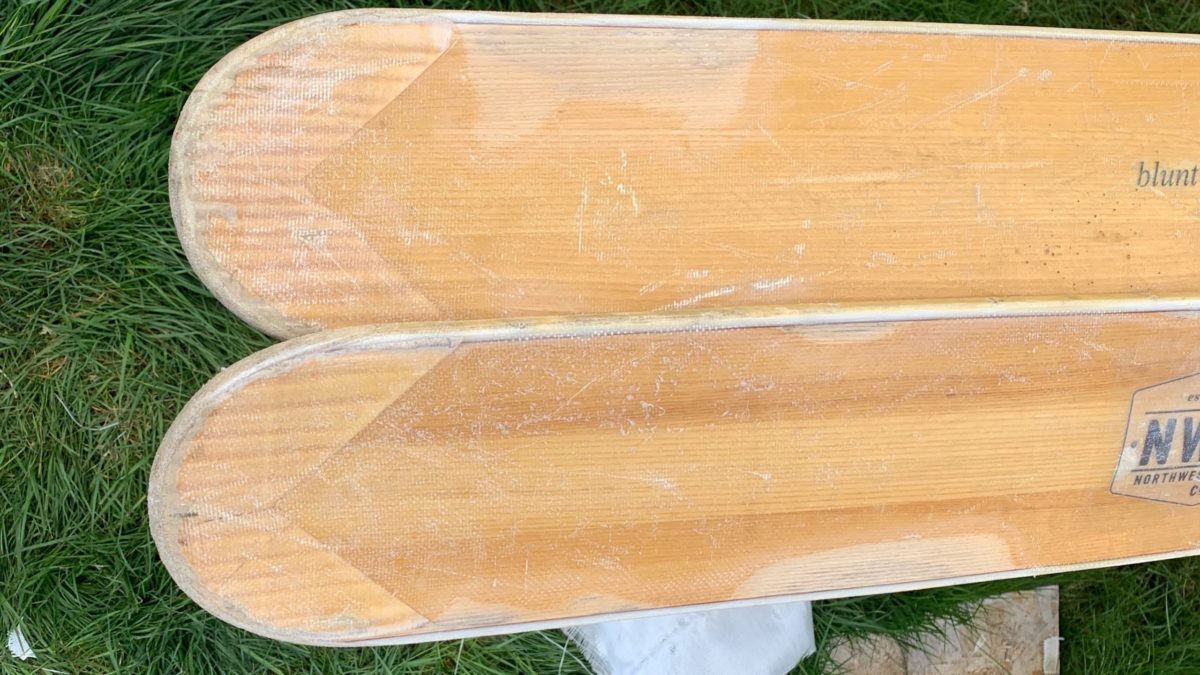
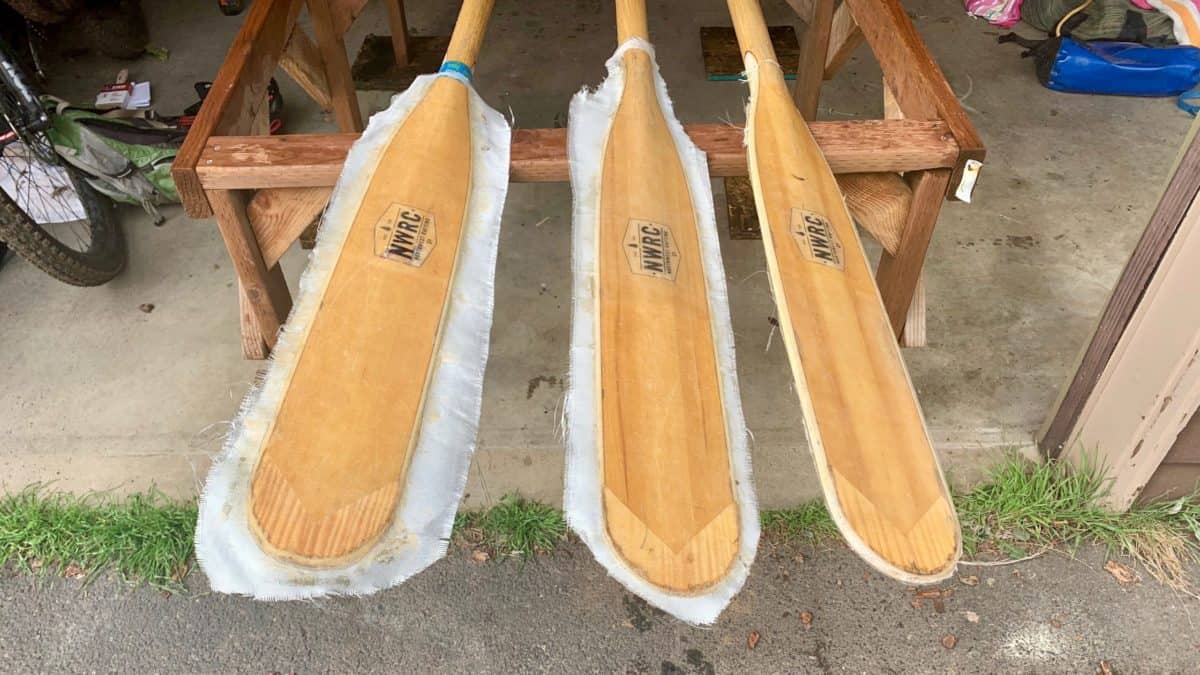
Ready for patch
Patch
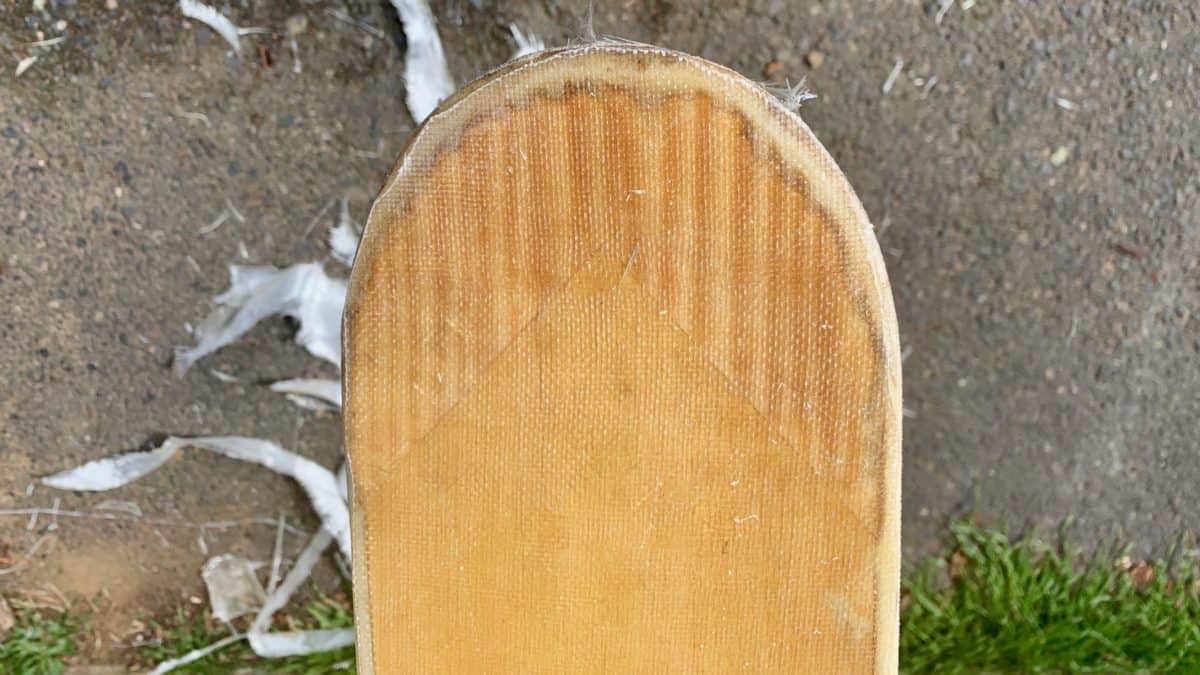
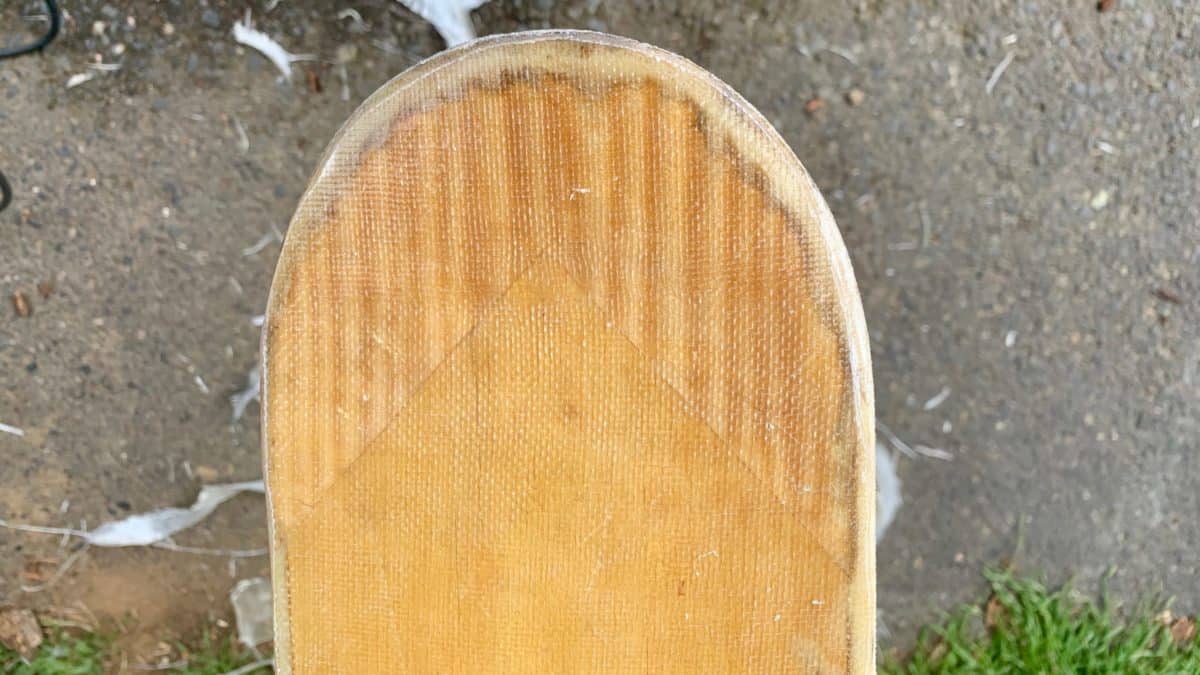
With the area sanded I cleaned it all off with some rubbing alcohol and let dry. This patch was a little bit of an experiment. It was really helpful in getting a feel for the process. I cut pieces of fabric out that were around an inch larger than the area I was going to patch. Mixed up the resin and hardener and put a thin layer down. Next I laid the cloth over the resin and brushed more resin on top, saturating the cloth. Use the provided scraped the spread the resin and smooth out and wrinkles in the cloth. I let these patches sure for about 12 hours. Before I moved to the next step I made sure they didn't have a tacky feel to them.
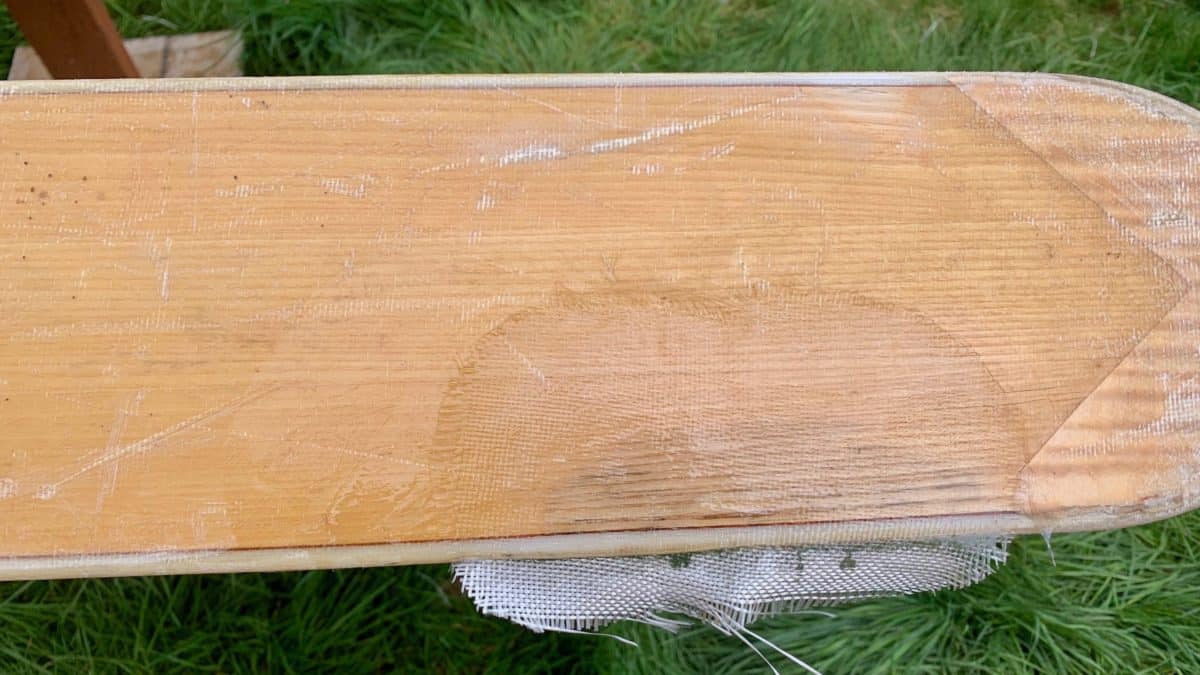
Patched up
Blade Cover
The fiberglass kit didn't come with enough fabric to cover the entire surface area of both sides of the blade. You can buy extra cloth in 8 sq ft packs, two of those was the perfect amount.

Fabric for the entire blade
Add a thin layer of resin, lay down the cloth, more resin, and smooth with the scraper. The temperature will determine how quick the resin starts to harden. Careful not to mix too much if you are't ready to use it all. I did one side of one blade at a time and it worked really well. Also this is a very sticky process, be careful what you touch. I let everything cure for about 24 hours since the temps were mostly in the 50s. To get a nice smooth edge work resin and fabric past the area you want covered. You will be trimming excess later.
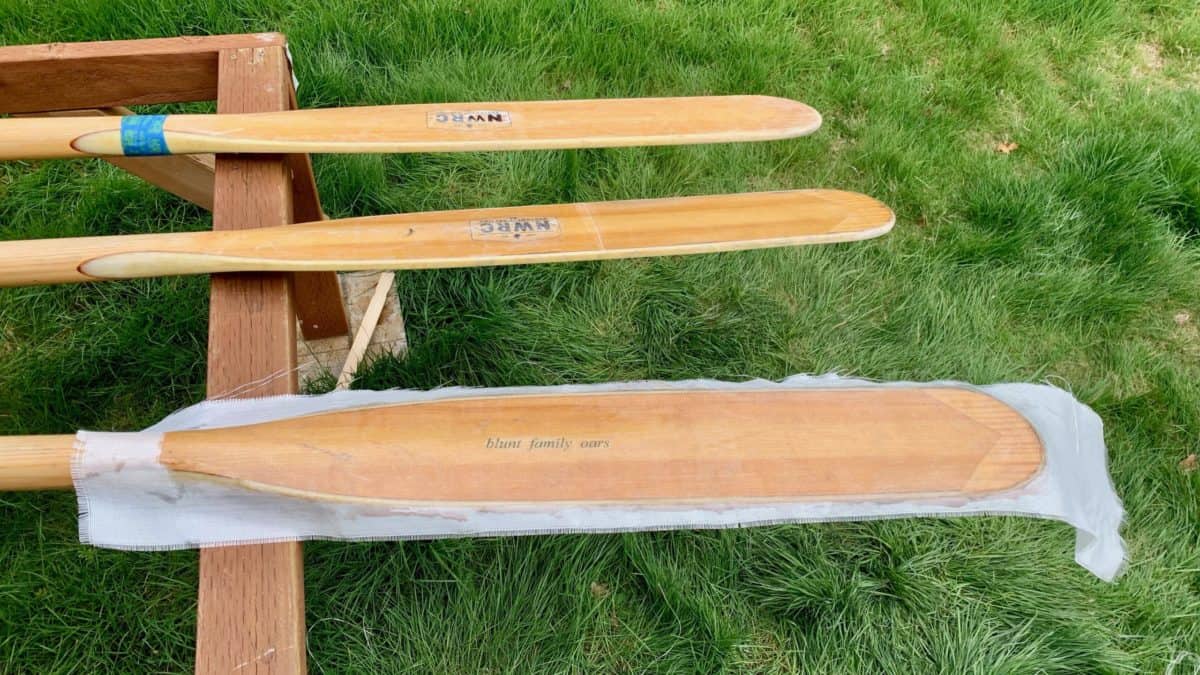
One blade done
Trim and Sand
Once everything was cured and not longer tacky, it is time to trim the excess. I used a box cutter to trim the unused fabric and was able to get a pretty nice smooth edge. You will notice a spots that have extra resin, try to trim those off as well. The more you can cut off the less you will have to sand later.
Trim the excess
With the extra fabric trimmed off carefully sand the edges down. I used my sander with some 220 paper and it worked great.
Trimmed and sanded
Finish
Once all of the edges were trimmed and sanded I added one last coat of spar urethan to the shafts all the way up to the edge of the fiberglass. Wipe everything down with a wet rag for that fresh from the factory look.
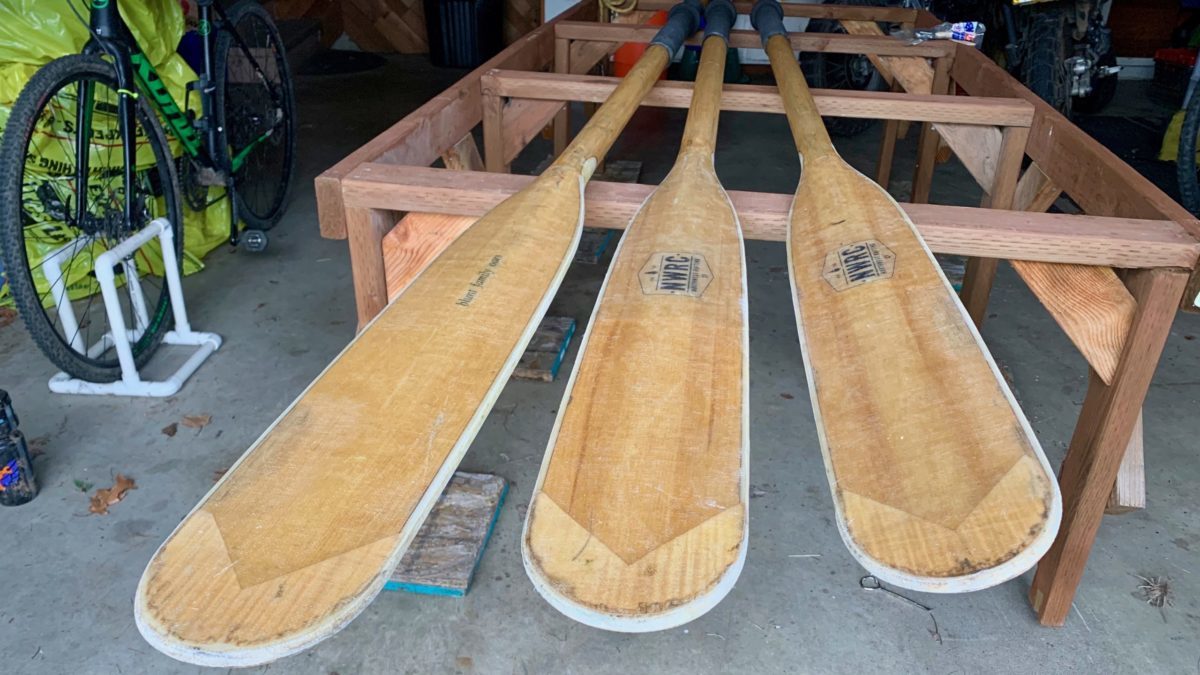
All finished
Any pro woodworkers or fiberglass folks out there have some tips or tricks? Please share in the comments below.